Week 3 Day 2 of Studio Project... Note: I think I kinda like the purple fish on team 3 's blog :P
Basically for today, I found out that as the actor in the second shot was keyed out and rotoscoped, there were no shadows acting the ground, thus I decided to add them with some masks and color correction. In addition, I assisted Samson with the rotoscoping on shot 2. In my opinion, It is really tedious and time-consuming. I feel that Ive wasted an awfully lot of time rotoscoping, especially when we have so little active members, some whom only does what they wanted. In addition I enhanced my door by replacing the circular protruding lock with a hexagon-shaped one, so that its rotation is more visible. I had my diffuse channel texture removed too as it was causing the model to look ridiculously dark. That is all folks.
Wednesday, August 31, 2011
Tuesday, August 30, 2011
30/08/2011 - Samson
Toda I set up render passes for both the staircase and post apocalypse shots, with Mr Leong's help, and further refined the post apocalypse rotoscope with Joseph. I also tweaked the lighting for the post apocalypse shot.
One of the problems I faced today was that I needed the CG model to reflect the environment, however I did not want the image plane to be rendered. This couldn't be done with the camera's image plane so I had to set up a plane and project the image on to the plane as a texture.
One of the problems I faced today was that I needed the CG model to reflect the environment, however I did not want the image plane to be rendered. This couldn't be done with the camera's image plane so I had to set up a plane and project the image on to the plane as a texture.
29/08/2011 - Samson
Over the weekends, I did the lighting of the staircase shot. By adjusting the directional light in the scene so that the shadows of the CG object aligned with the shadows casted by the objects in the footage, I achieved 80% accurate lighting. After that, I added a dome of spotlights to simulate global illumination, then adjusted the colour to match the footage. I also set up an ambient occlusion layer for the scene.


Finally, the problem of baking the textures has been solved! According to mr Leong, it turns out that the UVs overlapping are causing the bake to not work properly. However, at this time, I had already finished moving the UVs, one by one, over a cropped frame of the footage.


I also shifted the object in the post apocalypse around to get the correct composition and adjusted the textures on the building and car so they looked realistic.

Monday, August 29, 2011

Saturday, August 27, 2011
Week 2 Day 5
Week 2 Day 5 of studio project. I think I spend half my work time rotoscoping....
Today I completed my blastdoor. textured, lit and fixed bugs associated with it including several mesh issues. In addition, I continued to rotoscope a shot in my scene which apparently, I had forgotten, as the project frame range was not set properly, resulting in parts being cut off. Therefore, I had learnt that setting project is very important especially in nuke and to make sure the the frame range is correct. After several hours of rotoscoping, I work on shot 2 as requested by samson to properly remove the green screen. After several trial and error with the keying nodes, I decided to use ultimatte as the best option and produced fantastic results compared to the primatte and the keylight nodes. Moreover, there were several issues with the ground too, due to the shadows and spill from the green screen. It was to the best of my abiltities, that I tried to colorcorrect to level the color to the actual plate but to no avail, as there was too much difference in the color. Shades of gray and green makes it really difficult to correct it,and I was only able to level the color of the green shades with the ground.
Friday, August 26, 2011
26/08/2011 - Samson
I spent the whole of today tweaking the lighting of the post apocalypse shot, and mainly trying to solve the problem with baking my staircase textures. However, at the end of the day, even with Mr Leong and Mr Pang's help, the problem remains unresolved... Hopefully Mr Leong will be able to solve it during the weekends.. I might also try to render the projection and cut out the images in photoshop, then assign them to the steps as textures.
A problem we encountered for the post apocalypse shot was that the sides of the portable green screen were still visible after the screen was keyed out. This meant that I had to manually rotoscoped it out. This
used up a large portion of my day as well.
Staying back until 9, I animated the signboard, tweaked the textures and found some textures for the pavement.

used up a large portion of my day as well.
Staying back until 9, I animated the signboard, tweaked the textures and found some textures for the pavement.
Result of failed baking (Oven exploded according to Praveen):


Week 2 Day 4
Week 2 Day 4 of Studio Porject. 6 more days to go which makes it 6 days X 9 hours = 54 hours more to holidays. lalalalla.
So for today, I decided to enhance my door model. That means I took 3 days to work on tht model. A serious waste of time especially when people can just download them like FTW ?? I had a lot of problems searching for the right textures for the door. After several hours of searching, I finally managed to find the right set of textures, most of them were downloaded from cgtextures.com. I had generated bump maps and other several effect maps too with the help of a program. In addition, there were a lot of problems in my mesh. Due to a boolean operation a part of the model was left protruding out. deleting the faces would result in a leftover edge line. and deletion of the edge would result in crash. I decided to leave the exposed edge as removing it was in vain. Moreover, I had my door model imported to the scene where I animated it in sync with the footage.
Thursday, August 25, 2011
25/8/2011 - Samson
After working on the staircase shot for the entire day yesterday, I decided to work on the lighting and texturing of the cg elements in the post apocalypse scene. First, I lighted the scene using a directional light as the keylight picking the colour of the light from the sky in my footage. I placed a sphere in the middle of my scene, using it as a reference to adjust my lights. I also added a dome of spotlights emitting only diffuse to represent the soft lighting coming from the sky.
I then proceeded to light the rest of the scene, but no! The tail of the helicopter was completely unrealistic! After adjusting the textures and lighting on the helicopter to try and make it look at least convincingly realistic, I decided to just remove the tail and instead put part of the rotor in the foreground, very close to the camera. It would then be blurred using depth of field.
I then surfaced and textured the signpost and signboard, using the sign texture made by Richard. The signpost was initially too smooth so i added a brownian to the bump channel to break up the specular on the surface. A marble was also stacked on top of the base shader to dirty the post slightly. For the signboard, I needed an alpha channel for the area where the paint was supposed to have fallen off, however, the gray in the texture was made by overlaying a dirty texture onto the text and colour. Hence we were not able to generate the alpha using photoshop, so we tried using the keying tools in nuke to key the gray/silver areas out, effectively giving me alpha channels where it was required. I also added an area light, picking the colour from the road, to simulate bounce light from the ground.
After receiving feedback from Mr Pang on my staircase's perspective being off, I realised some of the steps were intersecting with the cg wall. I then shifted the vertices of the walls so they did not intersect with the steps. I then rendered out the walls, put them into photoshop and adjusted the perspective of the matte painting. This completely resolved the perspective problem! I then noticed another problem with the steps: when the steps moved down, the texture projected on to the front of the steps did not follow the steps. Perhaps the texture would have to be baked so they would follow the steps.
I suspect the next few days will consist of frantic rushing, later nights and people becoming crazier than normal.
Week 2 day ?? [aya actually is 3 la]
Lost count of which day was today cause everyday seems to be same and so is yesterday's today and tomorrow's tomorow and ... whatever... I might as well forget my name or smthn... smlj !!!
So basically I continued with my door model today, This time the outline was measured with precision using rulers and measuring tools. I had put a lot of effort in making my door model as accurate and precise as possible. calculating how much distance each part must move and doing boolean operations where needed. In addition, I discovered that 40 percent of all my boolean operations does not work or they have problems. Hence, it is only reasonable to use alternative methodsto solve the booloean issue. Up to date, I left with 1 boolean problem which I am going to ask my lecturers for assistance tommow. Moreover, I textured the door using several textures I found in deviantart, giving the door a greenish armored look. Finally I had the door animated, setting keyframes on every 8 frames or so.
Wednesday, August 24, 2011
24/08/2011 - Samson
It's the eighth day of the studio project and stress levels are rising steadily. Some have resorting to singing, some have resorted to swearing and some have resorted to casting imaginary spells on people using a wacom pen. Anyway, today was a boring day. I was staring at the screen the whole day trying to match the lines on the texture to the lines on the actual wall by manipulating the texture in photoshop. I think it looks pretty nice in the render (so nice you can't see the difference). I supplemented this by rendering out the image at 1080p and painting and blending the images together in photoshop, on a new layer so I can save it out as an image. So that's what I did for 8 hours. Painstakingly paint the lines and texture in. For 8 hours.
After that, I tried to randomise the texture of the steps, however, not only did it not work, it became even more obvious that there were only 2 variations of the texture being used. All of a sudden, a light bulb exploded in my head. I realised I could use camera projection to project the texture from the footage onto the front of the stairs. This would, with one fell swoop, eradicate all continuity problems as far as that area was concerned. So I proceeded to do just that. While there were some minor discrepancies, which I resolved by moving the vertices of some of the steps, it worked like a charm.
I also managed to figure out the optimal timing for the steps' animation, I had to compromise on the jerking motion (of the steps) a little, as I only had so many frames to work with in order to sync with the live action. If I fully emphasised the jerks, I would exceed the frame limit. Further adjustments to the animation would be need to ensure the steps are completely level when Shaheed walks over them.
After the steps came down, another gigantically obvious problem reared its head. The top part of the steps, which looked fine before it started moving, looked as flat as a computer screen once it started moving downwards. As of .currentTime, I am unable to solve this problem although I tried bump mapping the steps. I even tried creating a bump map from the image in photoshop, but it just won't work!!! However, I managed to catch some highlights for the front of the stairs using bump mapping and adding a specular directional light.
cmds.powerDown
Final Result (as good as real!)

Lowered steps (ignore Shaheed)

Matte Painting

Texture:

SummaryShaheed
Hi, I know I'm kindda late in updating this post but okay let me do a summary of what I've done. My tasks in the beginning were rather simple just collecting reference pictures and having to act in the scenes for the video. As for the reference pictures, I had to find several sources for pictures on destroyed and run down buildings. I even had to look up on environments that shows devastation. Our video, we are trying to achieve the apocalypse look. After different tasks were assigned, I was needed to do a part in Shot 1. In which I had to composite a model of a lion stone structure model into the shot. Having those references picture as a guide, I was able to at least have a rough idea how the textures are like. After the latest milestone, I was advised by Mr.Pang about how important it was to actually get the whole structure right based on its height and its corresponding texture with its surroundings. He stressed the need to achieve various lightings and cast shadows that the structure and the actor have to interact upon. Apart from that, had a little boost about MAYA which was lectured by Mr.Chee Leong earlier in the day.


week 2 day 2
Week 2 Day 2 Of Studio Project ... officially run out of quotes... or maybe too tired. and guess what, I spend more time in school than doing any other thing.
Basically for today, I decided to do modelling, as I am nearly done with my compositing. Hence, I decided to model the door, which was supposed to be revealed when the Samson's staircase moves down. Finding the basic outline of the door was rather complicated as Samson wanted to add a vehicle behind the door, including whether the door should slide down or be pushed. After much thought and brainstorming, we decided to do a scifi door, 8 sides in total. In addition , I decided to add a circular lock and use several door designs originating from some of my references.In conclusion, the modelling is still a work in progress because I had to re-model the door as I did not match the model to the scene.
Tuesday, August 23, 2011
Week 2 Day 2 - Richard

Today, I have continued modelling the building stairs, adding rails and steps to it, it was rather challenging playing with the faces, and planning ahead. Reason being every stair well is slightly different even though from a distance they seemed to be the same angle and length, which they aren't!
I've assigned shaders to it as well, and textured the stair wall.
I've assigned shaders to it as well, and textured the stair wall.
Thank You!
23/08/2011 - Samson
For today, I added the metal supports where the signboard connects to the post. I then added edges to the helicopter's tail rotors and warped them to make them look mangled in a crash. I also cut off part of the tail and placed it in the foreground, where it would be out of focus in the final render. I also pushed the models on the left further to the left, making space for the matte painting and preventing the road from looking cramped. The I am Legend shot was used as a reference.


I also had the idea of building a rough shape of the actor using primitives to represent his body and did some key framing to make it follow him through the shot. This way, we could use that object as a reference for scaling the other models. Mr Pang also gave us suggestions like angling the signboard to give it perspective. The staircase in Richard's building was also adjusted to give the shot perspective. Previously, the staircase blocked about 1/4 of the shot and it looked flat because it was perpendicular to the camera.
I have also completed the animation for my staircase. Previously, the animation did not turned out as i wanted, instead of like in the playblast, the steps were moving in a sine wave pattern. I solved this problem by parenting the top most step to the one below it, then the second top most to the one below it, and so on. This is done so that when the step below moves down, the step above would move the same amount in the same amount of time. Before i did this, the end result was correct but the steps were all moving independently of each other.


I was also unable to match the photo I took of the wall to the baked texture as there was too much perspective distortion. Mr Pang then suggested I map the wall texture to my cg wall and try to match the lines, then render out the image and blend the two images together in photoshop.
Mr Leong also taught us how to do render passes today.


I also had the idea of building a rough shape of the actor using primitives to represent his body and did some key framing to make it follow him through the shot. This way, we could use that object as a reference for scaling the other models. Mr Pang also gave us suggestions like angling the signboard to give it perspective. The staircase in Richard's building was also adjusted to give the shot perspective. Previously, the staircase blocked about 1/4 of the shot and it looked flat because it was perpendicular to the camera.
I have also completed the animation for my staircase. Previously, the animation did not turned out as i wanted, instead of like in the playblast, the steps were moving in a sine wave pattern. I solved this problem by parenting the top most step to the one below it, then the second top most to the one below it, and so on. This is done so that when the step below moves down, the step above would move the same amount in the same amount of time. Before i did this, the end result was correct but the steps were all moving independently of each other.
Final result:


I was also unable to match the photo I took of the wall to the baked texture as there was too much perspective distortion. Mr Pang then suggested I map the wall texture to my cg wall and try to match the lines, then render out the image and blend the two images together in photoshop.
Mr Leong also taught us how to do render passes today.


Week 2 Day 1 - Richard


Today was a very productive day! As I've really tried to do things as fast as I can. I've finished modelling the remaining part of the dusbin, however not yet textured! (Pics Attached)
Also I spent most of my time modelling a building, which I gave up finding a royalty free one online that is for Maya. Hence the brave decision and a start right away! It is another leap for me as this is something larger that I had never modelled from scratch before. It took me loads of time clicking vertices, faces, and edges and merging and combining. It really strains my eyes, also picking the faces to assign shaders for windows, and window frames too, oh thats a pain in the ass, its really tiny to pick, and did I mention that this building has 8 floors with 8 windows per floor per facing of the building?!
I further challenge myself to model the stairways at the side of the building, by referencing pictures online, I found a suitable design to follow. So far my progess is done with the main building, exterior and interior, only the stairs were half done. I shall continue to do it! and If I have more time, I shall further fine tune the building geometry! Also I believe I have to wreck certain parts of it too as it is a Apocalypse shot! (Pics Attached)
Thank You!
Monday, August 22, 2011
Week 1 Day 5 - Richard


This day, was a continuation of yesterday after the foundation was built (The Floor plane). I had placed some big cubes to act as building markings to match the perspective and to adjust the lighting to get the shadows right.
I took the wrecked car by Guo Wei and placed it in the scene to match it, it turned out not bad, just that I feel more adjustments has to be made to fine tune it.
I tried to remake/re-model the broken concrete wall again for better results, I mimicked it from reference pictures of broken down walls, and realise that there are metal framing in it, and when they are damaged, they would protruded out and jagged. I've also textured the concrete wall as well as assign shaders twicked to my desired looks. (Pic Attached)
I've also finish modelling the road sign and textured it, the texture was created from scratch in photoshop. (Pic Attached)
I had started halfway on modelling a dusbin too, which is 75% done.
Thank You!
22/08/2011 - Samson
I spent the most of today trying to project the wall onto the clean plate on to my CG wall. The reason for doing this is that I would later bake the texture, then clone the tiles in photoshop. I consulted Mr Leong for the best way to accomplish this, and he taught me to assign an image texture as a projection from the camera, hence matching the background plate. There was some blurring of the image, which was solved by turning off the filter in the file node. This was all fine and dandy until I tried baking the texture with mental ray. After baking, the texture became quite messed up (picture coming soon).

 Even Mr Leong was quite baffled. Later in the afternoon, Mr Leong finally found the answer: it was a problem with Maya, and that there was a new way for baking the textures. I was supposed to duplicate the wall object, then use the transfer maps tool to bake a lights and shaded map onto the duplicated wall using information from the original wall with the projected texture. This worked perfectly!


I also started animating the steps, however, the steps did not go down one by one, instead, all the steps collapsed to the ground together. I used scripting to animate the stairs, using a loop within a loop to move all the steps from the top to the current step down a certain number of units. This is repeated for each step until the steps are all flat on the ground. However, the problem I described above occurred. Mr Leong gave me a suggestion to add an identical keyframe 5 frames after to hold the position of the step. This would give the step jerks each time one step went downwards. However, the result after I added the key frame was not what I wanted, as the steps jumped back to their original position halfway into the animation before moving downwards again. It seems like the script would need an overhaul tomorrow.
For the apocalypse shot, I adjusted the broken wall modeled by Richard until it was at the correct position and scale. I then did further modeling on Richard's signboard, giving it more bevels so the edge would not be so sharp. I also rounded the end of the pole where the signboard hangs from, as the edges were too sharp.

I then download a helicopter model, however the textures were too low res to be used in the shot. Having no choice, i had to find another helicopter model with better textures and "broke" the tail off by cutting and deleting faces from the body of the helicopter. It may not make it into the final shot after all unless I can scale it down to without making it look out of proportion, as it seems to be too huge and would take the attention away from the actor.
Overall, I learnt some new techniques for camera projection today, and hopefully my workflow will speed up in the days to come.
I will update this post with pictures tomorrow morning!


Final Result:


I also started animating the steps, however, the steps did not go down one by one, instead, all the steps collapsed to the ground together. I used scripting to animate the stairs, using a loop within a loop to move all the steps from the top to the current step down a certain number of units. This is repeated for each step until the steps are all flat on the ground. However, the problem I described above occurred. Mr Leong gave me a suggestion to add an identical keyframe 5 frames after to hold the position of the step. This would give the step jerks each time one step went downwards. However, the result after I added the key frame was not what I wanted, as the steps jumped back to their original position halfway into the animation before moving downwards again. It seems like the script would need an overhaul tomorrow.
For the apocalypse shot, I adjusted the broken wall modeled by Richard until it was at the correct position and scale. I then did further modeling on Richard's signboard, giving it more bevels so the edge would not be so sharp. I also rounded the end of the pole where the signboard hangs from, as the edges were too sharp.

I then download a helicopter model, however the textures were too low res to be used in the shot. Having no choice, i had to find another helicopter model with better textures and "broke" the tail off by cutting and deleting faces from the body of the helicopter. It may not make it into the final shot after all unless I can scale it down to without making it look out of proportion, as it seems to be too huge and would take the attention away from the actor.
Overall, I learnt some new techniques for camera projection today, and hopefully my workflow will speed up in the days to come.
Week 2 Day 1
It is ... the first day of the second week of studio project. Miss my L4d2, miss my runescape, miss my teddy bear.
Today, I did yet another round of rotoscoping. I had to redo all of the rotoscoping, because the previous one was really messy. It was indeed a really tiring job, because the feet I was rotoscoping was moving quite a lot. Therefore, I had spent the entire day, 12 hours rotoscoping that damn feet including the whole body of the actor for approximately 50 frames. In addition, I learnt that by rotoscoping each parts of the subject individually, it will be much easier, not to mention much faster. That is all for today, 12 hours of continuous rotoscoping. Peace be with thee.
Today, I did yet another round of rotoscoping. I had to redo all of the rotoscoping, because the previous one was really messy. It was indeed a really tiring job, because the feet I was rotoscoping was moving quite a lot. Therefore, I had spent the entire day, 12 hours rotoscoping that damn feet including the whole body of the actor for approximately 50 frames. In addition, I learnt that by rotoscoping each parts of the subject individually, it will be much easier, not to mention much faster. That is all for today, 12 hours of continuous rotoscoping. Peace be with thee.
Saturday, August 20, 2011
Week 1 Day 5
Week 1 Day 5 Of studio Porject...
Today, I did the keying for the first shot. It was not as easy as it seems because footage look extremely noisy and fuzzy resulting with a lot of problems faced with it. In the end, I had to set keyframes for my keying.
In addition to what I did today, there was the rotoscoping, which was probably they most tedious and tiring job of all. I had to rotoscope the feet out in which the person was walking up the staircase. In my opinion, this is a total waste of time and I wouldnt be surpised to find anyone so naive that would rotoscope moving feet. So to those that are trying to rotoscope, get a life...
Friday, August 19, 2011
19/08/2011 - Samson (updated)
After handing out tasks to my group members today, I started on the texturing of the staircase model. I assigned Joseph to do the keying/rotoscoping in the staircase shot, Richard to continue working on the broken wall in the foreground, Guo Wei to work on the matte painting for the post apocalypse shot, and Shaheed to find some 3d models of animal statues for the staircase shot.
Initially, I modeled out and created color and bump maps for the walls. I spent almost the whole day doing this before realising (from Mr Pang) that I could do a camera projection of the section of the wall below the railing on a polygonal plane, and I really didn't need to texture the entire pillar.
This is the results of my efforts :


At the end of the day, Joseph had progressed quite far into his keying/rotoscoping work , Shaheed had found his model, Richard had progressed with his CG wall, and Guo Wei was also making progress in his matte painting. Guo Wei also volunteered to take photos of buildings during the weekend as we could not find the appropriate angles online. Richard also finished creating a texture of a road sign.
Initially, I modeled out and created color and bump maps for the walls. I spent almost the whole day doing this before realising (from Mr Pang) that I could do a camera projection of the section of the wall below the railing on a polygonal plane, and I really didn't need to texture the entire pillar.
This is the results of my efforts :


I was, however, unable to project the UVs using camera projection. I then decided to map the steps instead.. I had already duplicated and moved the steps into place, but automatic mapping of the steps did not work properly. I then decided to texture the steps first, then duplicate and translate them into place. The results look good enough to me, and I will probably create bump maps for them on Monday. I cannot use camera projection on the steps as they will move quite some distance during the animation. images of results are coming soon!
At the end of the day, Joseph had progressed quite far into his keying/rotoscoping work , Shaheed had found his model, Richard had progressed with his CG wall, and Guo Wei was also making progress in his matte painting. Guo Wei also volunteered to take photos of buildings during the weekend as we could not find the appropriate angles online. Richard also finished creating a texture of a road sign.
Week 1 Day 4 - Richard
Today I've taken one of our shots, converted it to Iff format and put it into Autodesk Maya to match a ground plate to its perspective. It was extremely challenging as our raw footage ground wasn't entirely flat, in fact it was a slope road, and slanted sideways! I matched the ground nearest to the camera first, and extended the plane with lots of divisions so that I could move its edges and vertises to match the slope further away from the camera.
The biggest challenge was matching the slopes, it seems almost impossible to do a awesome match as perspective gets smaller towards the vanishing point, and it is impossible to zoom in nearer to see while not moving any geometry or changing perspective. Hence it was hard to align the plane to the footage.
This part of the process took the longest period of time, once it was done, I added other geometries like cubes to test out my perspective against buildings further away in the shot, it seems perfectly fitted!
Once this was set up, I can add objects into my scene and have less worry. I tried to add pavement at both sides of the road with 3d texture of fractal noise, assigned "use as background" shader to the main road so as to cast shadows. I've also lighted the scene using directional lights with raytraced shadows and afew point lights with depth matte shadows as well as area lights for bounced lightings.
I've also tried to play with something new that I wasn't taught yet, under dynamics - shatter, to create debris from geometries. This is be something I need to find out more to make it photo realistic as its another eye candy to an "Apocalypse" shot.
(Sorry for posting 2 posts late, "this" and "week 1 day 2" as I was ill and absent on day 3)
Thank You
Week 1 Day 2
Today I had helped out in brainstorming ideas for our two shots and drew storyboards with ideas for framing as well as explanation for broken down layerings for effects and compositing such as CGI elements, stock footages and keying.
Initially the ideas were, shot 1: Lonely guy walks on an open field and giant spaceship hovers above him. It compromises a CGI car at the side beeping and CGI spaceship, keying for character and digital matte painting for the horizon line as well as debris that floats randomly with the help of python scripting.
Shot 2: A view of a cowboy from the back of his shoulder which would be roto-ed and showing the environment infront of him; a stormy sky with dust and debris swirling in the background desert like floor which has matte painting mountains in the back drop.
Even after our idea wasn't recommended, I still helped to further fine tune and think of new stuffs. I've also contributed in trying to break down shots and vision its way for post work later on after filming so as to have a clearer view and its possiblities on it.
Thursday, August 18, 2011
18/08/2011 - Samson
Today, we have finally entered post production at last! I started the day by assigning tasks for my group members to complete, Joseph to start keying out the actor for the staircase shot, Guo Wei to find and destroy cars (digitally of course! :O), Richard to create a fractured wall for the post apocalypse shot, and Shaheed ro encode all the footage properly and search for statue 3d models of mythical creatures. Most of them managed to complete their tasks, Guo Wei was initially assigned to look for wrecked cars, but no free ones could be found, so he downloaded a car model and wrecked it himself!
After that, I undistorted the footage in Nuke before exporting them to be used in Maya. Many ways were tried before arriving at a solution. Using both Image and Line Analysis resulted in a stretched imaged, while using Grid Analysis resulted in a severely warped image. In the end, I had to eyeball it and try to undistort it manually.
I spent most of today morning and afternoon trying to match the CG camera in my scene to the actual camera. It was so much more difficult actually doing it than watching Mr Leong match it in 5 minutes.....
The reason why I spent so long matching it was that even though I matched the ground plane perfectly, but when the steps were created, they did not match up at all! And that's how I ended up spending half a day trying to match the perspective of the 3d step to the footage. Later I realised I could create a plane and use it to match the wall as well, giving a better perspective match for the camera. After this was done, I then proceeded to create the detailed version of the step geometry and translating them. At this point, they steps matched up reasonably well, but it was still not a perfect match. I then decided there was no choice but to move the vertices of the steps on a per-object basis to get them to match up perfectly. This discrepancy was probably due to the fact that the bricks were laid by men, and hence were not perfect. Once the perspective was matched, all the modeling went smoothly after that. Earlier in the day, I went to the locations to take measurements of all the objects that would be important/need to be modeled. This helped me tremendously as I did not have to eyeball the objects and estimate their dimensions.
Today, I learnt how to use the ambient occlusion material in mental ray from Mr Pang, it was practically just a click away! Mr Leong also taught us how to match the CG camera to the real camera, and how to do stitching of UVs, previously we just left them as they were after mapping the UVs. I also learnt how to undistort footage using the LensDistortion node in Nuke.
After watching Source Code, I am extremely motivated to make the shots both photorealistic and appealing!! Apparently almost all of the train ecterior and station was CGI!! And what's more, no one noticed at all!!!
Week 1 Day 2*
Today I had helped out in brainstorming ideas for our two shots and drew a storyboard with an idea for framing as well as explanations for broken down layers for effects and compositing such as CGI elements, stock footages and keying.
Initially the ideas were shot 1: lonely guy walks on an open field, and giant spaceship hovers above him with CGI car beeping and CGI spaceship, keying for character and digital matte painting for horizon line as well as debris that floats randomly with the help of python scripting.
Shot 2: A view of a cowboy from the back of his shoulder which would be roto-ed, and showing the environment infront of him, a stormy sky with dust and debris swirling in the background desert like floor that has matte painting mountains in the back drop.
Even after our idea wasn't recommended, I still helped to fine tune and think of new stuffs. I've also contributed in trying to break down shots and vision its way for post work later on after filming so as to have a clearer view and its possibilities on it.
Thank You
Week 1 Day 4
Week 1 Day 4 of Studio project. Its been 4 days... and ive spent 48 hours in school, when will this end...
Today, I assisted in converting the files from quicktime to targa and tiff file formats, so that they can be imported into maya. However, there were many problems with the rendering, only two frames were rendered and they're in ".tmp" extension. I requested for Sirdhars's assistance and he could not solve the issue. In the end, The job was given to another person.
In addition, I assisted in the removal of the lens distortion issue faced in both shots. By using a node called, " lens distortion" in nuke X, I was able to distort the footage. However, It wasnt as easy as it seems because the distortion used in the image analysis function as well as the other functions in the node could not distort the footage correctly. Therefore , with the help of Mr. Pang, we saved a test image and did the distortion in photoshop which was much easier and accurate using the distorted image as reference, I was able to distort the footage correctly. I learnt that by reversing the distortion and using it to distort the cg instead, the footage will look more realistic.
Moreover, I did some composting in the the first shot, masking as well as the green screen removal. There were several problems faced especially with the chromakeying, which was done in nuke. most of the spill on the actor could not be removed. After several trial and error, I finally managed to removed the spill. However, the final footage looked really noisy.
In conclusion, today was a productive day as I did quite a lot of work.
Wednesday, August 17, 2011
17/08/2011 - Samson
Today, we started off by filming the two scenes. For the staircase scene, we used a green screen in the alley next to the staircase so we could key the actor out in post production. We also took clean plates for both scenes. However at first, the shots were over-exposed, although they appeared properly exposed on the camera's LCD. We learnt from Mr Leong that, we should not trust the LCD display, and we should use the zebra lines to gauge the exposure of the scene instead. This did not occur to me at first as my DSLR's display has always given me accurate exposures.
After reshooting the staircase shots, we shot the post apocalyptic scene. The actor was supposed to move in from the right of the frame to the center of the frame. In this shot, we used a green screen to key out the actor as we would eventually replace the background. Unfortunately, the green screen could not cover the actor once he started moving. Moreover, there were shadows of the nearby trees falling on the ground, when it was supposed to a post apocalyptic scene and there were not supposed to be any neatly growing trees. Another problem was that the actor was too small in the shot.
Hence after receiving pointers from both Mr Leong and Mr Pang, we decided to reshoot both scenes. For the staircase scene, at first we ended the shot of the actor coming down the staircase with him turning around and walking forward. We then started the shot of him walking into the alley with him turning around and walking into the alley. This time, we had him turn around and stop at a certain spot. We then had him start at roughly the same position in front of the alley. Also, previously, the green screen represented the door and he would walk towards the green screen. This time, the green screen would be very close to the actor and the person holding it would move together with the actor, so we would have less rotoscoping to do. We would be able to just key the actor out and touch up with roto masks.
For the post apocalyptic scene, we did the same thing, having two people hold a green screen and follow the actor as he moves about the scene. We would then key out the actor and composite him back into the shot. This would enable us to place any CG elements behind the actor. Previously, we were not able to move the green screen as we only had 1 person holding the green screen. I also lowered the exposure and shot the dusk sky in case we needed it.
I think we learnt a lot today, in terms of the ways we could go about accomplishing our desired effect, the reasons advantages of shooting a scene one way over another, for example, more work in production and less work in post production in the case of moving the green screen.
Week 1 Day 3
Week 1, Day 3 of Studio project. The lack of sleep is killing me. I had been in school for 12 hours straight with the lack of quality food and the insanity is killing me slowly.... very..very.. slowly...
For today, I spent most of my time assisting in the shoot with the group. I wasnt an actor thus I had to assist in holding the green screen and moving it where the actor moves. It was really tiring. My group and I had to re shoot several times to make perfect the shot. In total, we had to do a total of three re-shoots for both shots.
There were several problems we faced today. The first was that the actor in the two shots weren't synchronized. So transitioning between the two clips weren't possible. In the second shot, the green screen wasn't big enough to fill the entire character's movements and actions.Therefore, I had to manually move the green screen whereever the actor goes. It was afterall, with the help of Mr.Pang and Mr. Leong that we were able to go in the right direction, if not a lot of rotoscoping would be needed. Moreover, I had learn that film cameras werent always reliable and dependable to a certain extent. Barrel distortions are visible, especially in the second shot. and the exposure was not clearly shown in the camera preview, resulting a second reshoot.
In conclusion, today was a really tiring day due to the amount of re-shoots we had to do, but it was indeed productive.

Week 1 Day 2 Fong Guo Wei
For Day 2 (yesterday), we brainstormed and finalized our ideas, one of which is as shot of a post-apocalypse environment, and the other, a shot of a hidden hideout in a staircase.
After which, I looked up on the breakdown of visual effects used in the movie "Forrest Grump" as suggested by my teammate, Samson. I learnt about how sets can be replaced simply by compositing different shots together, without relying too much on creating models of objects to be placed inside the set (which would be a more taxing and long-winded work). While researching, for mood shots and how apocalyptic films are shot to bring out the mood and effect of the devastated environment, I found out that a lot of such films are "night-scenes". This is hard because of the project requirements, and we're supposed to shoot day-scenes. However, it was not long after we found som, from Resident Evil 3: Extinction, Resident Evil 4: Afterlife and I Am Legend.
After which, some of my teammates went around to find suitable locations to shoot the shots. There were problems which we encounter with shadows and lightings, and how the perspective will be solved. The problem with shadows is solved by superimposing shadows of a separate shot. We're still in the midst of solving the other problems we encounter. Woo.
Tuesday, August 16, 2011
Week 1 Day 2
Week 1 Day 2 of Studio Project... Today, I did researched on the apocalyptic scene, on what kind of color grading to use and on what to add in the shot In addition, the other group members and I had to finalized our story and get it approved.
I faced several problems today. The first, was to solve the shadow issue with the second shot, where the staircase was leveled to form the ground. Apparently, shadows of the actor weren't visible, thus we decided to use data from another footage and superimpose it on the actual footage with experimental blending modes to form shadows.
Basically, I learnt how use shadows from another footage and superimpose it on the actual with blending modes to make it look realistic.
16/8/2011 - Samson
Today, I started off by discussing and brainstorming with my group members to come up with more ideas to present to our project mentor, Mr Pang. Previously, we had four ideas, however, they were deemed to be too ambitious, and did not really fit the point of the project, which was to do digital set replacement and/or extension. Hence we came up with more ideas that demonstrated the requirements of the project better. We also continued to develop the concepts further after they were approved.
The ideas that were finally approved are:
1) A shot in which the actor walks down a staircase, towards the camera, then stops and turns around as the steps lower into the ground. This reveals a door, which the actor approaches and activates.
2) A post apocalyptic shot, with the actor walking towards the camera. In the background will be a post apocalyptic city, with destroyed and aged buildings. The actor will appear to be the only survivor. The camera will be on top of a small "hill". This will give us a better view of the city scape. The buildings and rubble around the area will be composited using matte painting and 3d modeling techniques.
After fleshing out our ideas, like the mood and composition of the shot, the elements that would be 3d models or matte painting, we went around the school to scout for locations and encountered some problems.
Firstly, for the staircase shot, the staircase was originally supposed to be level ground, which would lower into steps when the actor approaches it. However, there was no way we could get the camera high enough to capture the shot at the angle we needed. We tried another camera angle (shooting from behind the actor instead of from the front, so the actor would be walking away from the camera instead of towards it), however, this angle cut off an important element in the shot: the steps. To solve this problem, we changed the shot so the actor would walk down the stairs and they would lower into the floor after that, revealing a door. That would have been perfect if the shot had stopped at this point.
However, Mr Pang told us before, that in order to make the elements believable, they would have to interact with the actor. So, we decided to have the actor approach and activate the door. This would really reinforce the idea that the steps had really lowered into the ground, because the actor would never have been able to approach the door if the staircase had merely been cloned out. This posed a new challenge, as the actor would have to walk into the area occupied by the staircase, or at least appear to do so.. In order to accomplish this illusion, we decided to film a shot of the actor walking into an alley next to the staircase with the exact same composition, camera angle and perspective. This would put him in the same lighting conditions as the other shot. This also put him in the shadow of the staircase wall. There was also a shadow of the staircase wall on the wall of the building. Back at the lab, Joseph and I tried compositing the shadow from the second shot onto the wall of the first shot. At the end of the day, we managed to figure out what we exactly needed to do for the staircase shot and the problems that we might encounter along the way.


For the post apocalyptic shot, we managed to scout out the location to shoot it. We also took some photos to use as guides for our composition for the final shot. The main problem here was a lack of suitable locations as we did not want to shoot outside of school due to the amount of time we would need to travel to and fro. Hence we decided on a stretch of road on top of a "hill" in the school carpark. We would then digitally remove the grass and background in post production, then add buildings in the form of matte painting or 3d models and replace the sky and background. The sky would be done using either stock footage or After Effects, and the background would be matte painted. There might also be debris and buildings collapsing in the background to create movement, hinting to the audience that the background was not fake. However there was not enough time to do a mockup and run tests as it was already over 6pm.
I learnt many things today, like simple tricks to influence the audience to believe something was real when it was not, like interaction with the CG object and having motion in matte paintings, and that we should think out of the box in order to arrive at creative solutions. I also watched movies like Forrest Gump (and its making of) to research on ways the vfx supervisors use to trick the audience. Some tutorials were also found to try out collapsing and fracturing objects in Houdini. We would then place these into the background of the post apocalyptic shot.
Test Shots


Pictures, references and schedule will be up tomorrow! Pictures Added!


Original Post @ 11:16 PM 16/8/2011
The ideas that were finally approved are:
1) A shot in which the actor walks down a staircase, towards the camera, then stops and turns around as the steps lower into the ground. This reveals a door, which the actor approaches and activates.
2) A post apocalyptic shot, with the actor walking towards the camera. In the background will be a post apocalyptic city, with destroyed and aged buildings. The actor will appear to be the only survivor. The camera will be on top of a small "hill". This will give us a better view of the city scape. The buildings and rubble around the area will be composited using matte painting and 3d modeling techniques.
After fleshing out our ideas, like the mood and composition of the shot, the elements that would be 3d models or matte painting, we went around the school to scout for locations and encountered some problems.
Firstly, for the staircase shot, the staircase was originally supposed to be level ground, which would lower into steps when the actor approaches it. However, there was no way we could get the camera high enough to capture the shot at the angle we needed. We tried another camera angle (shooting from behind the actor instead of from the front, so the actor would be walking away from the camera instead of towards it), however, this angle cut off an important element in the shot: the steps. To solve this problem, we changed the shot so the actor would walk down the stairs and they would lower into the floor after that, revealing a door. That would have been perfect if the shot had stopped at this point.
However, Mr Pang told us before, that in order to make the elements believable, they would have to interact with the actor. So, we decided to have the actor approach and activate the door. This would really reinforce the idea that the steps had really lowered into the ground, because the actor would never have been able to approach the door if the staircase had merely been cloned out. This posed a new challenge, as the actor would have to walk into the area occupied by the staircase, or at least appear to do so.. In order to accomplish this illusion, we decided to film a shot of the actor walking into an alley next to the staircase with the exact same composition, camera angle and perspective. This would put him in the same lighting conditions as the other shot. This also put him in the shadow of the staircase wall. There was also a shadow of the staircase wall on the wall of the building. Back at the lab, Joseph and I tried compositing the shadow from the second shot onto the wall of the first shot. At the end of the day, we managed to figure out what we exactly needed to do for the staircase shot and the problems that we might encounter along the way.


Composited the shadow of the second shot into the first.

For the post apocalyptic shot, we managed to scout out the location to shoot it. We also took some photos to use as guides for our composition for the final shot. The main problem here was a lack of suitable locations as we did not want to shoot outside of school due to the amount of time we would need to travel to and fro. Hence we decided on a stretch of road on top of a "hill" in the school carpark. We would then digitally remove the grass and background in post production, then add buildings in the form of matte painting or 3d models and replace the sky and background. The sky would be done using either stock footage or After Effects, and the background would be matte painted. There might also be debris and buildings collapsing in the background to create movement, hinting to the audience that the background was not fake. However there was not enough time to do a mockup and run tests as it was already over 6pm.
I learnt many things today, like simple tricks to influence the audience to believe something was real when it was not, like interaction with the CG object and having motion in matte paintings, and that we should think out of the box in order to arrive at creative solutions. I also watched movies like Forrest Gump (and its making of) to research on ways the vfx supervisors use to trick the audience. Some tutorials were also found to try out collapsing and fracturing objects in Houdini. We would then place these into the background of the post apocalyptic shot.
Test Shots


References:
Mood for Staircase shot


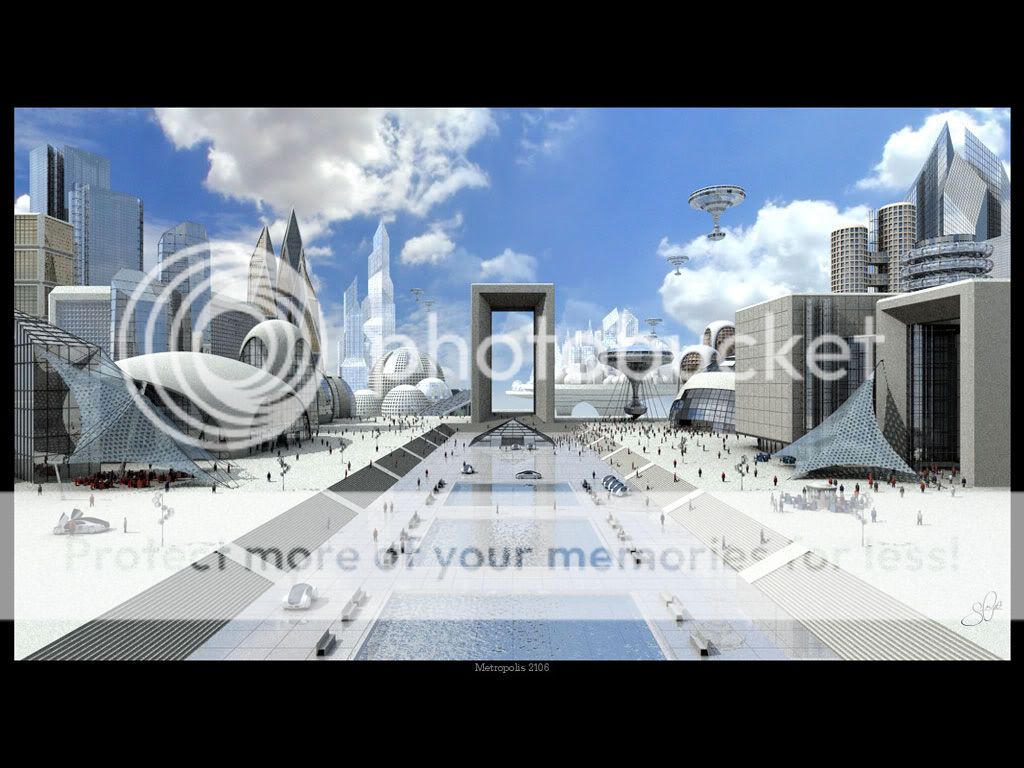

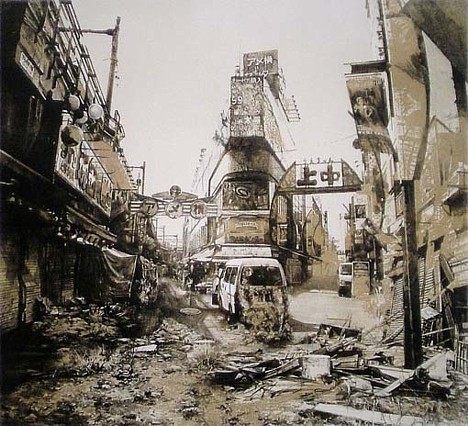
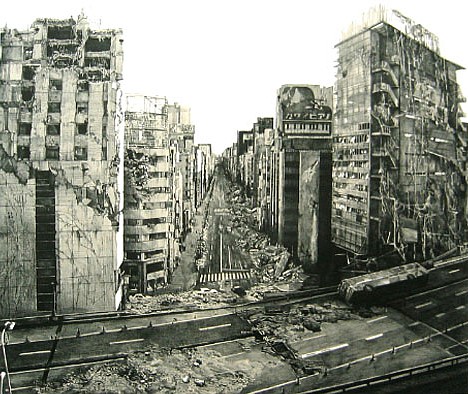
Post-apocalyptic shot:
Lighting and composition for the shot
Subscribe to:
Comments (Atom)